Friday, August 27, 2010

Fabric Flower Paper Clips

Ok!  It's time for the tutorial on how to make these Paper Clip Flowers!


What a sweet way to display pictures or attach a birthday card to a gift bag!

Here's how:

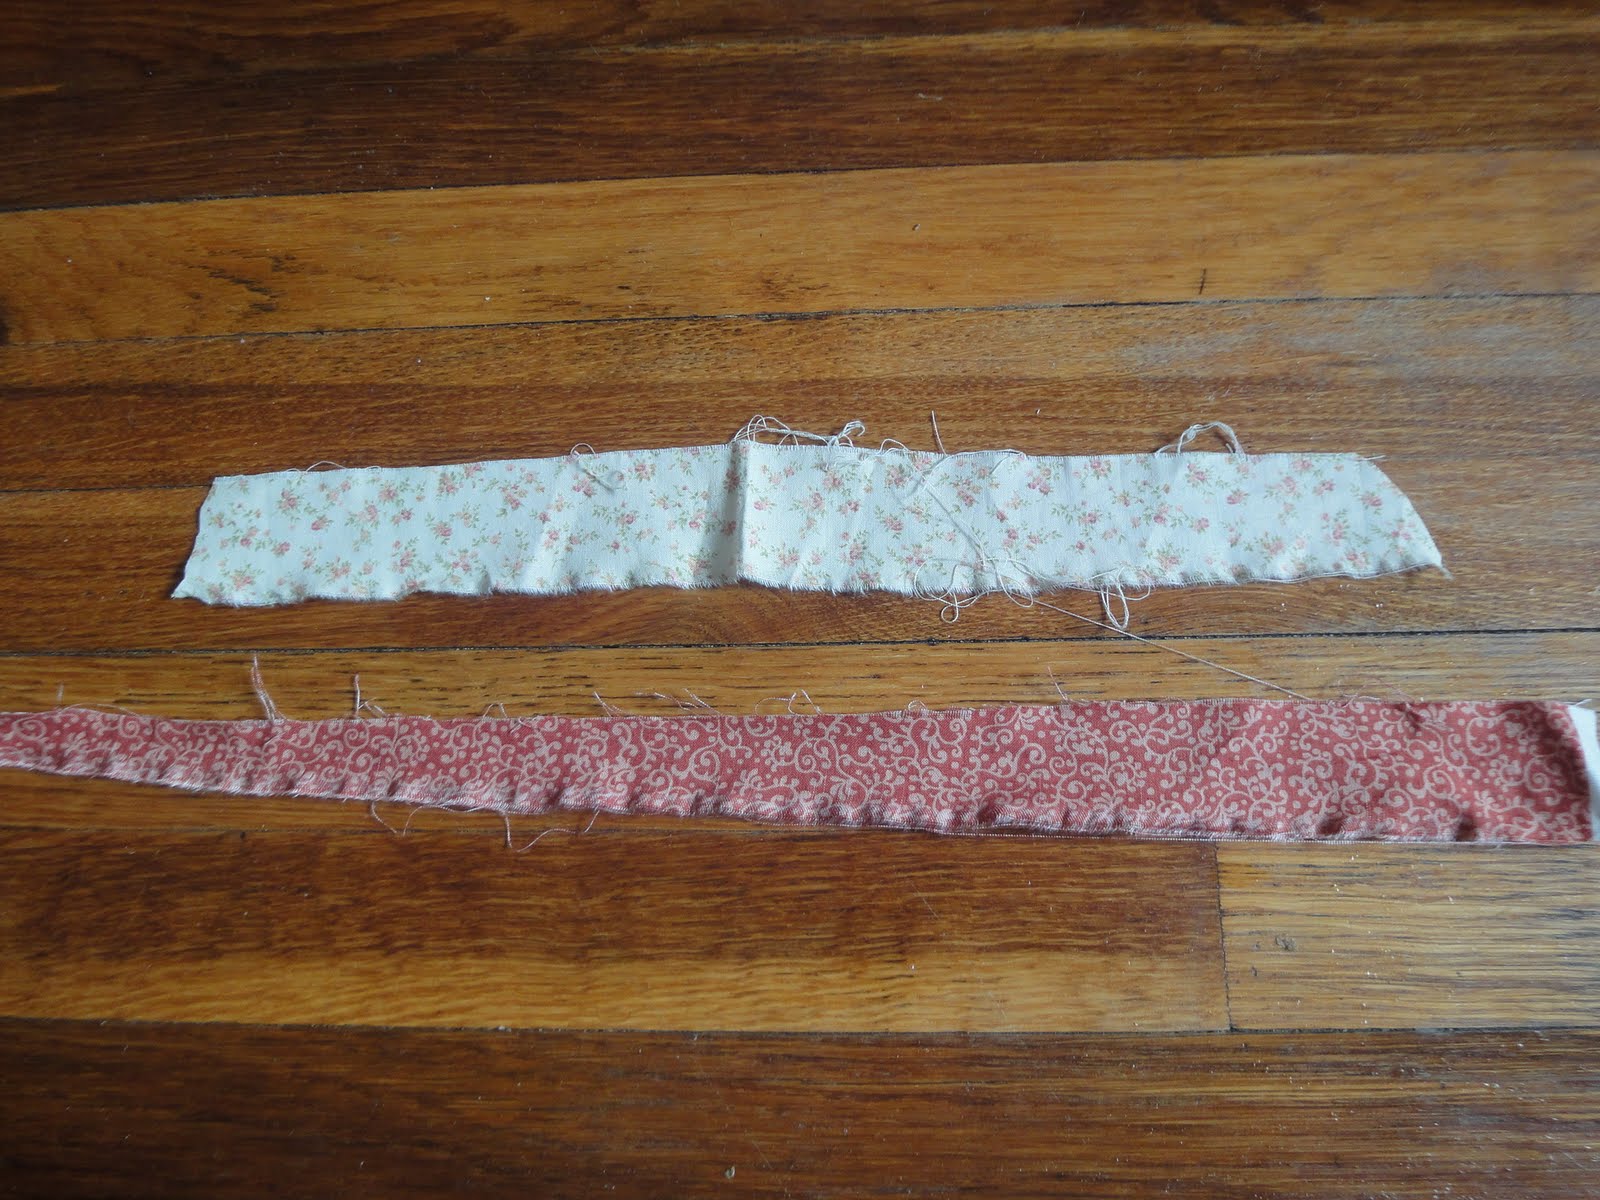
1. Cut some strips of fabric about 2" wide (doesn't matter how long).

2. Fold the fabric in half with wrong sides together and start to roll it.

3. Keep folding the fabric as you roll.  I also like the twist the fabric before rolling it to get a variation with the frayed edges.  Stop when you get a flower big enough for your liking.

4. Cut off the excess fabric and tuck the end BEHIND the flower.

5. Take a small square or cardstock and pile some hot glue on it.

6. Glue the fabric flower on the glue (making sure to glue down the piece you folded behind the flower).

7. Cut off the excess cardstock.

8. Take another small square of cardstock and slip the paper clip on it.

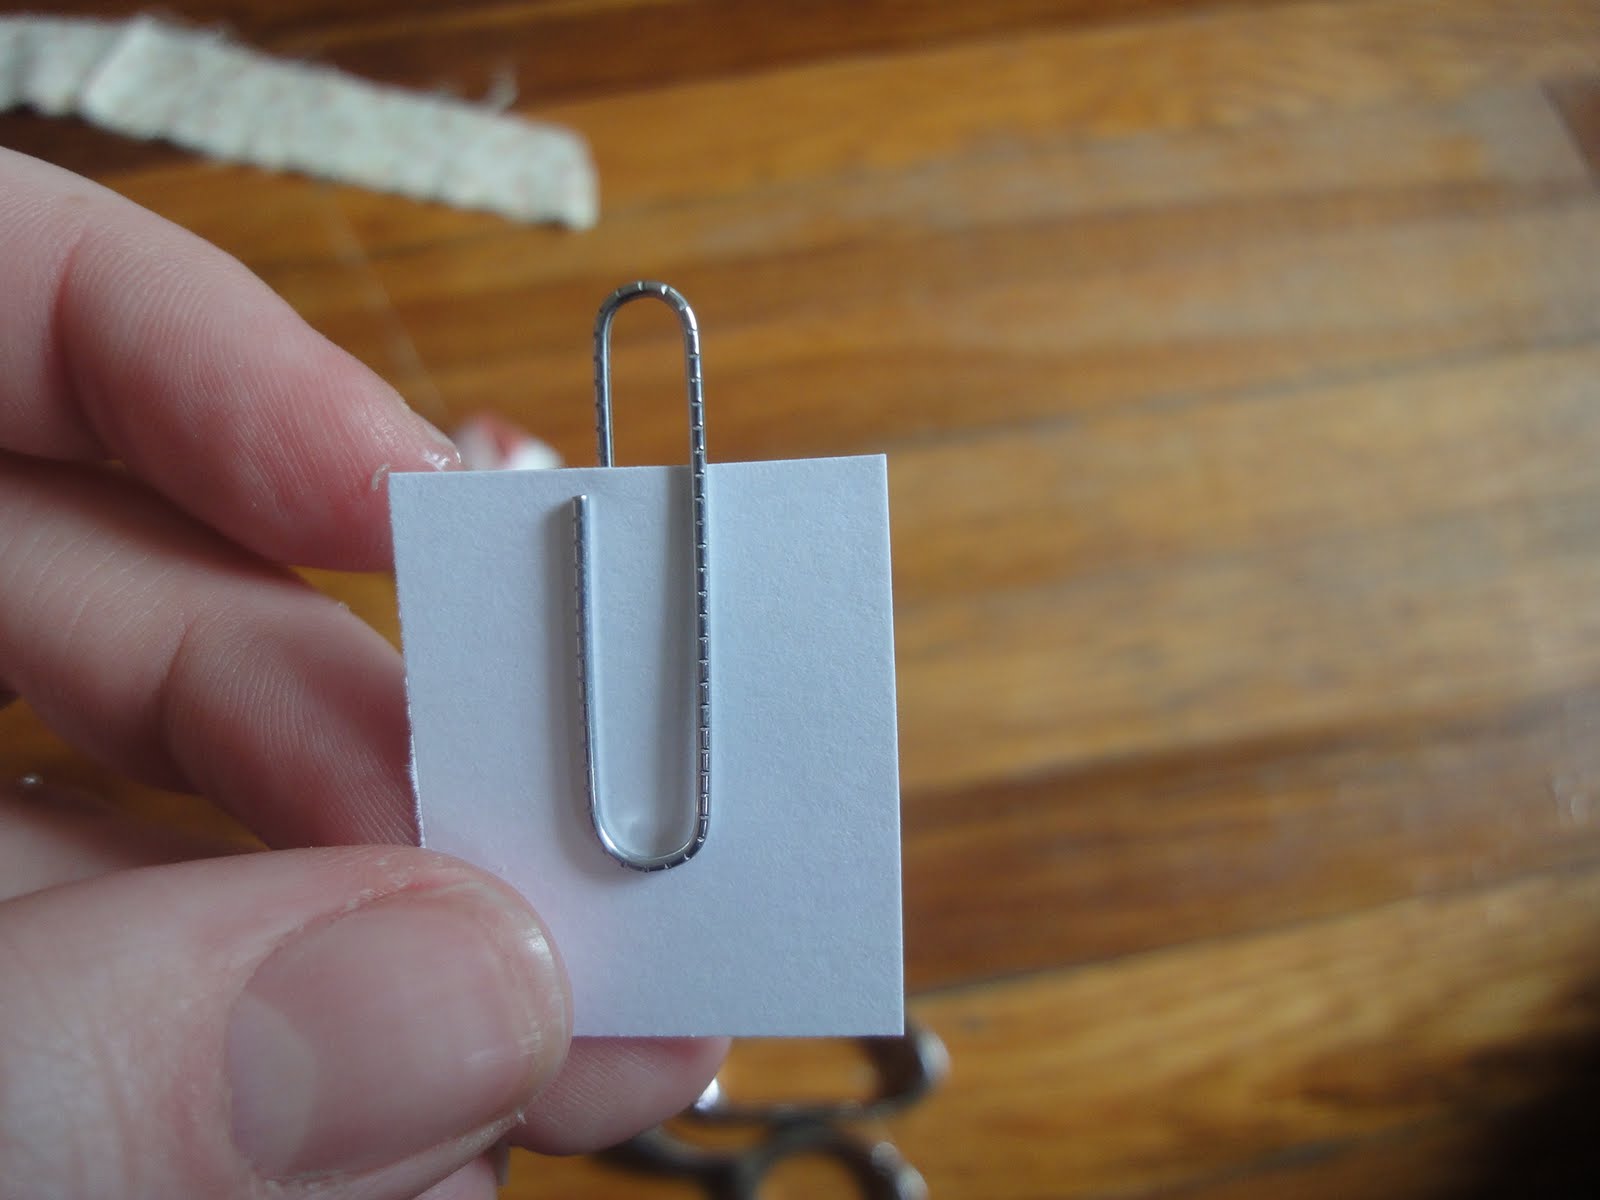
9. Add some more glue to the side with the LONGER part of the paper clip.

10. Glue the fabric flower on top.

11. Trim the excess cardstock.

You're done!  Find something fun to attach it to!

Tuesday, August 24, 2010

Cork Board Picture Frames

Well, I finished decorating one of my blank white walls.


Today, I'm going to focus on how to turn picture frames into corkboards.
See those two on the left side?
This is going to make it so much easier to switch out the pictures as Little Bug grows up!

These are super easy and I hope that all of you try it!

I found my corkboard sheets at CVS in a 12x12 inch size. 
I'm pretty sure any craft store would also have these.
Just make sure you get a thicker cork board (1/4" is fine).

Take out the glass and picture from the previous pictures frame.
Cut the cork board the same size as the piece of glass (just trace around the glass to make it easy).

Put hot glue all around the inside of the picture frame and glue the cork on the inside.


Here's what it looks like from the front at this point:


Then, simply hang them on the wall with your favorite picture and a thumb tack!


Stay tuned later this week to see how to make those paper clip flowers that are holding each picture in place!

Monday, August 9, 2010

A Reader's Craft...

I love it when you try out the tutorials that post!

I also LOVE it when you send me pictures of what you created!

Here's a Flip Book one reader created from this post.


She even made a coordinating journal to go with it!

I think she put these in a silent auction at her church - great idea!

If anyone tries/copies/is inspired by anything on my blog, PLEASE send me pictures of what you create to betterlifebags@gmail.com!!!
Or upload them to our Facebook page in the Fan Photos section!

Friday, August 6, 2010

Update... The Bag that Travelled to India!

Remember this post and then the finished product?

Well, the bag finally made it to India with our Better Life Bags customer!

She gave the bag to Lavanya and I can't believe how PERFECTLY it matched her outfit that day!!


I feel so incredibly blessed that my bags are making a difference in people's lives.
Thank you for helping me do that.

Wednesday, August 4, 2010

Cheap Wall Decoration

Wow!  Has it been a long time, or what?!

We moved into a new house here in Hamtramck, MI - one with AIR CONDITIONING.  Can't tell you how incredible that feels after two months of putting our pillows in the freezer before sleeping.

I now have blank walls to decorate ... again.  Whoo hooo!
 

Here's my first installment of some cheap decorating you can do to any room on a VERY small budget!

The first stage of this wall only took some embroidery hoops that I found in various sizes at the thrift store.  I also found coordinating fabrics to go with my pillows.  Placed the fabric in the hoops, trimmed the excess fabric, nailed, hammered, and hung!

 
I found an awesome frame at the thrift store that needed no spray painting!  It matches perfectly!  So, I took out what was previous inside (apparently a $75 value after looking at the original tag), got out some family heirloom doilies, arranged them in the frame and hung them on the wall!


Doesn't get much easier than that!

There is another stage to decorating this wall, but it will have to wait for another day.  YES, I will be posting more regularly :)

Related Posts with Thumbnails