

I'm so guilty of using this old dish towel as my pincushion.

It has served me well and functions just like a pincushion, but it is ugly as ever!
It was about time I made something MUCH cuter with all the fabric scraps I have laying around.

And in case YOU need a cute pincushion, too - here's a tutorial!
1. Using a piece of muslin or plain fabric, trace a plate or something round with an 8" diameter.

2. Using the largest stitch that you sewing machine can make, sew around the perimeter of the circle. Be sure to backstitch at the beginning, but not at the end.

3. Pull the end your your thread VERY CAREFULLY to close up your circle.

4. Pour in 1/2 cup of emery sand.

~~~~~~~~~~~~~~~~~~~~~~~~~~~~~~~~~~~~~~~~~~~~~~~~~~~~~~~~~~~~~~
What?? You haven't heard of emery sand before?
OH! Let me tell you!
Emery sand is a better choice to fill your pincushions with for a few reasons:
~ It keeps your pincushion heavy and stable on your table.
~ It actually SHARPENS your needles each time you stick them in!
I bought 1/2 cup of emery sand for a fun ETSY seller "LoveLaurie".
She sells emery sand and really cute pin cushions at really reasonable prices!
See?


In fact, she's offered to GIVE AWAY 1/2 cup of emery sand to one of you so you can try out this tutorial!
To enter:
1. Follow this blog and leave a comment saying you do.
2. Link up a craft you have done {at our link party today} using fabric scraps then leave a comment telling me you did!
3. Grab either my blog button or the Scrap Happy Saturday button for your blog and comment back.
~~~~~~~~~~~~~~~~~~~~~~~~~~~~~~~~~~~~~~~~~~~~~~~~~~~~~~~~~~~~~~
Ok, back to the tutorial
5. Cinch up the bag tight.

6. Use the long string left over and use it to thread a needle. Sew the cinched part tight.

7. Cut another circle with an 8" diameter out of the fabric you want to be showing and stitch around it with a large basting stitch. Lay the first layer of the pincushion inside the circle, upside down.
{We are doing two layers so the emery sand doesn't escape.}

8. Pulling the string carefully, cinch up the pincushion and sew tightly shut.

9. Using embroidery thread and a long needle, make stitches starting from the cinched area and coming straight out the back until you get something that looks like this:
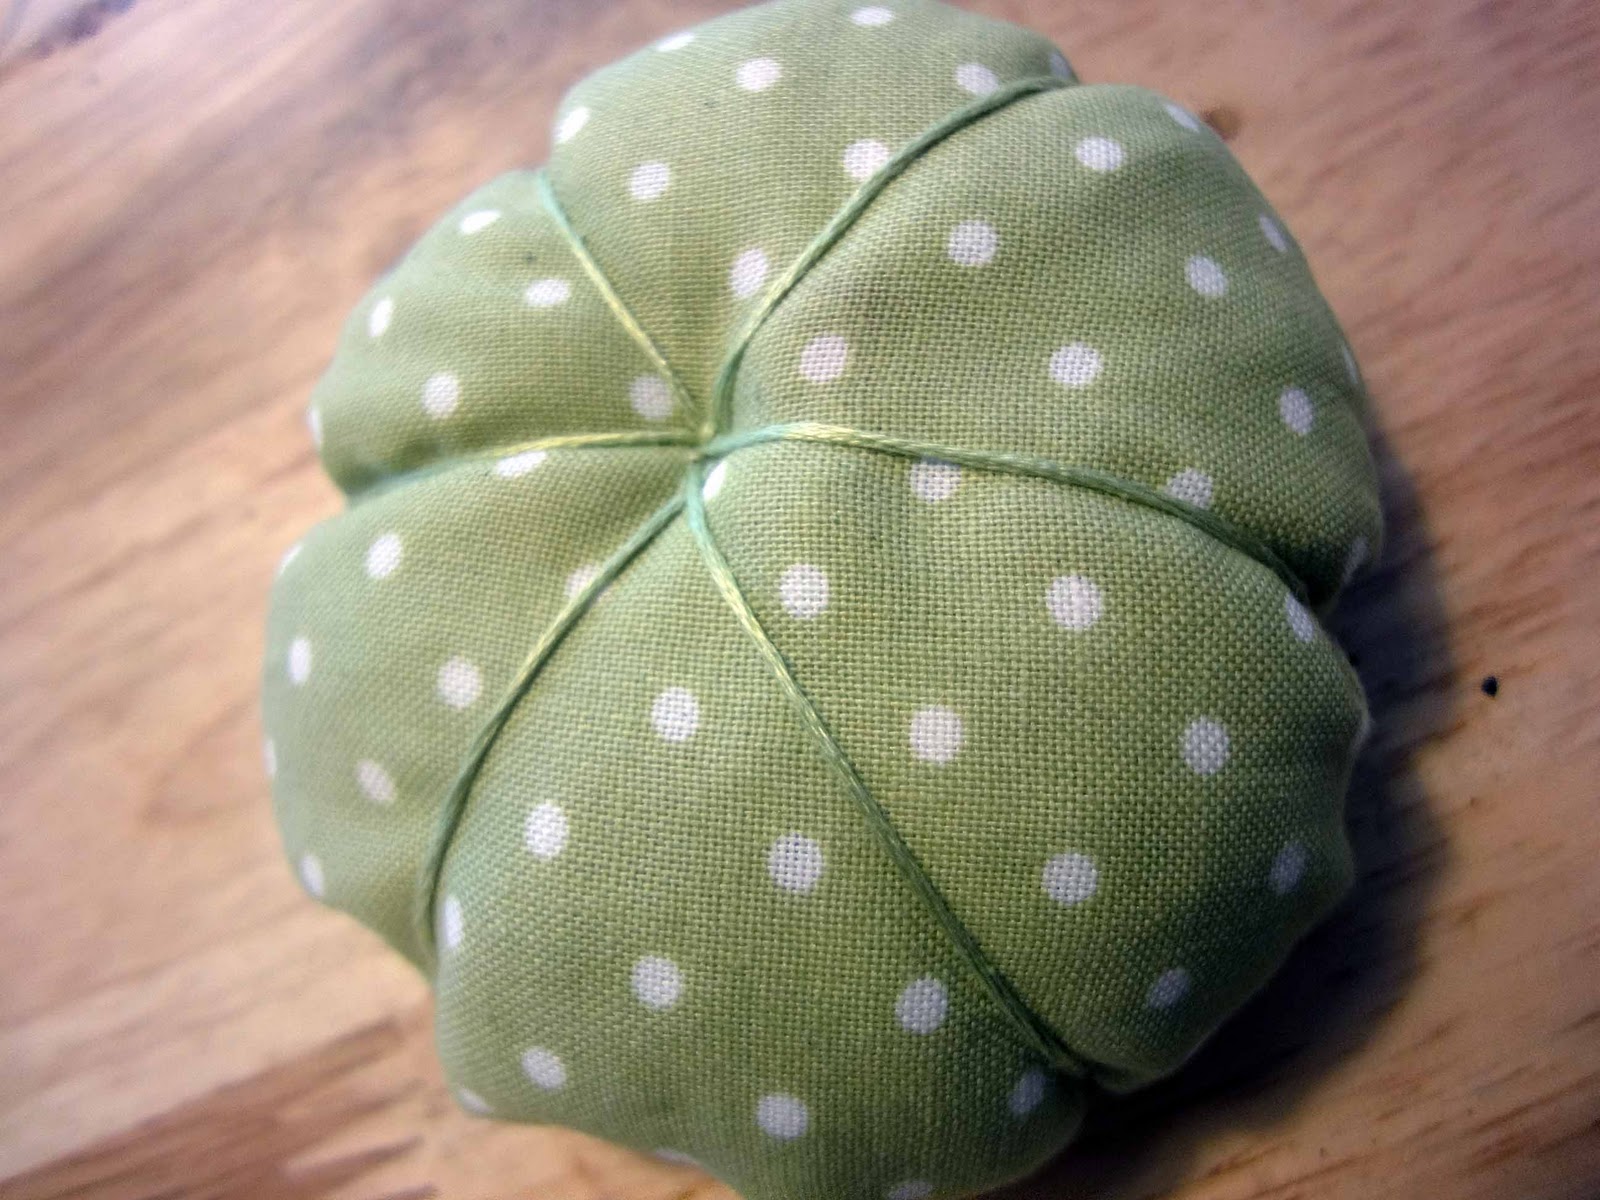
10. To cover up the cinched area, you can either use a piece of felt and sew a button to keep it closed, or find a print of a flower that you love like I did.
I cut two matching sizes from a Joel Dewberry fabric.

11. Turned them wrong sides together and sewed around the edges... leaving a small opening to turn it inside out.

12. After turning it inside out, I sewed around the edges and inside the flower to give it a little texture. Then attached it to my pincushion with small hand stitches on each petal.

You're done!
Now, remember to enter the giveaway for 1/2 of FREE emery sand!
Remember to enter:
1. Follow my blog and comment.
2. Link up a scrap craft below and comment.
3. Place either my blog button or the Scrap Happy Saturday button on your blog somewhere and comment back.
I will draw a winner on Tuesday, November 2nd!
Linky Party open until Thursday, November 4th.
I'd love to feature some of your crafts, so link up!

I have heard of emery sand but can't get it where I live (in the sticks). By the way I am a follower and have been enjoying your posts. Thanks for sharing.
ReplyDeleteI would love to win some emery sand. I'd seen it before on another tute but had no clue where to buy any. Thank you so much for the tutorial. Super cute pincushion.
ReplyDeleteI am a follower of Better Life Blogs via email subscription.
I would love to win some so I can try this! My tomato is a little outdated. :)
ReplyDeleteI follow! :)
kittycatsandairplanes@gmail.com