Showing posts with label Scrap Happy Saturday. Show all posts

Saturday, October 30, 2010

Emery Sand Pincushion Tutorial

I'm so guilty of using this old dish towel as my pincushion.

It has served me well and functions just like a pincushion, but it is ugly as ever!

It was about time I made something MUCH cuter with all the fabric scraps I have laying around.

And in case YOU need a cute pincushion, too - here's a tutorial!

1. Using a piece of muslin or plain fabric, trace a plate or something round with an 8" diameter.

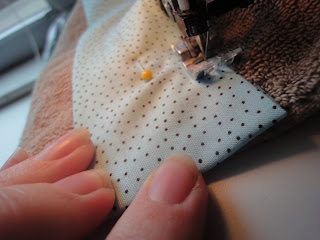
2. Using the largest stitch that you sewing machine can make, sew around the perimeter of the circle.  Be sure to backstitch at the beginning, but not at the end.

3. Pull the end your your thread VERY CAREFULLY to close up your circle.

4. Pour in 1/2 cup of emery sand.

 ~~~~~~~~~~~~~~~~~~~~~~~~~~~~~~~~~~~~~~~~~~~~~~~~~~~~~~~~~~~~~~
What??  You haven't heard of emery sand before?
OH!  Let me tell you!

Emery sand is a better choice to fill your pincushions with for a few reasons:
~ It keeps your pincushion heavy and stable on your table.
~ It actually SHARPENS your needles each time you stick them in!

I bought 1/2 cup of emery sand for a fun ETSY seller "LoveLaurie".
She sells emery sand and really cute pin cushions at really reasonable prices!
See?


In fact, she's offered to GIVE AWAY 1/2 cup of emery sand to one of you so you can try out this tutorial!

To enter:
1. Follow this blog and leave a comment saying you do.
2.  Link up a craft you have done {at our link party today} using fabric scraps then leave a comment telling me you did!
3. Grab either my blog button or the Scrap Happy Saturday button for your blog and comment back. 
 ~~~~~~~~~~~~~~~~~~~~~~~~~~~~~~~~~~~~~~~~~~~~~~~~~~~~~~~~~~~~~~

Ok, back to the tutorial
5. Cinch up the bag tight.

6. Use the long string left over and use it to thread a needle.  Sew the cinched part tight.

7. Cut another circle with an 8" diameter out of the fabric you want to be showing and stitch around it with a large basting stitch.  Lay the first layer of the pincushion inside the circle, upside down.
{We are doing two layers so the emery sand doesn't escape.}

8. Pulling the string carefully, cinch up the pincushion and sew tightly shut.

9. Using embroidery thread and a long needle, make stitches starting from the cinched area and coming straight out the back until you get something that looks like this:
 
10. To cover up the cinched area, you can either use a piece of felt and sew a button to keep it closed, or find a print of a flower that you love like I did.
I cut two matching sizes from a Joel Dewberry fabric.

11. Turned them wrong sides together and sewed around the edges... leaving a small opening to turn it inside out.

12. After turning it inside out, I sewed around the edges and inside the flower to give it a little texture.  Then attached it to my pincushion with small hand stitches on each petal. 
 You're done!

Now, remember to enter the giveaway for 1/2 of FREE emery sand!

Remember to enter:
1. Follow my blog and comment.
2. Link up a scrap craft below and comment.
3. Place either my blog button or the Scrap Happy Saturday button on your blog somewhere and comment back.

I will draw a winner on Tuesday, November 2nd!


Linky Party open until Thursday, November 4th.
I'd love to feature some of your crafts, so link up! 

Saturday, October 23, 2010

Guest Towels

Welcome to another edition of Scrap Happy Saturday!
 So glad you came to join us!
Remember to link up your fabric scrap projects at the end of this post!
I'll feature some of your next week :)

This week, my mother is coming into town.
And I have extra towels laying around from a wedding present that don't match our bathroom.

So, I decided to combine the two and make some Guest Towels!


Here's how you can too.

1. Print out letters from a word processing program like Microsoft Word.
I used the WordArt feature in a font I liked.
My letters were 2 inches wide and 3 inches tall.

2. Pin them on the BACK side of fusible fleece interfacing and cut them out.
{The back side would be the side that is going to fuse to the fabric}

3. Fuse them to the back of your fabric scrap.

4. And cut around the letter - leaving about 1/4" material all the way around.

5. Make small slits in the fabric all around the letter.  Cutting right up to the fusible fleece.
This is going to give it a raggy/shaggy look.

6. Sew around the letter to attach it to your towel - leaving the clipped edges free.

After all the letters are sewn on, you'll end up with a nice, cute guest towel!


To make the hand towel and washcloth match, follow these steps:

1. Take a fabric scrap and cut it to the width you like.
The length should extend just beyond the towel.

2. Iron the edges back about 1/4".

3. Pin it in the place you want it to go.

4. Fold the edges under so they meet up with the edge of the towel.
This will prevent fraying.
And sew close to the edge on all four sides of your fabric strip.

Cute, right?

Now you're ready for your guests to arrive!

These would also look super cute as a wedding present with Monogrammed initials!

OK!  You know what to do!
Link up your projects!
And grab the Scrap Happy Saturday button on the side of my blog to share this with others!


Link is open until next Friday!

Friday, October 22, 2010

Scrap Happy Saturday Round Up...

I had some great ladies link up to our party last week!
Thanks!

Here are their projects:

This is just one square for an entire quilt. 
I LOVE IT!
I think I'll make a table runner or something from the idea.
From the Patchy Apple - how cute is that blog name?

Look at how cool these knee patches are!
My husband needs me to mend a few pairs of his jeans... think he'll go for these?!
The Patchy Apple again :)

LOVE it when you post tutorials for GIRLS :)  
My little girl is due in January and I need to get busy crafting for her!
Crafting and Creativity

Thanks again for linking up!
Remember... TOMORROW is the day to link up any projects made from fabric scraps.

Saturday, October 16, 2010

Scrap Happy Saturday #4

*** Check the side of my blog for the winner of the Blue Cloud Organic Hemp Boo Boo Bunny! ***

On to Scrap Happy Saturday...
Don't forget to link up any projects you have done with fabric scraps at the end of this tutorial!
It doesn't have to be something you did this week... anything is accepted.

This week I REALLY wanted to get rid of a BUNCH of fabric scraps, so I came up with:

I've had an empty decorative dish sitting on my dining room table ever since we moved and all my previous decorative balls got lost/smashed/broken.

Since I wasn't about to go spend money on anything else, these were invented.

There are two ways to make them, so follow closely.

First, the small, twisted fabric balls:
Take a bunch of fabric scraps and cut them into strips.  Different lengths are accepted.

Tie them end to end.

Now here's the technical part.  Take a piece of paper and crumble it into a ball.

Using hot glue, start by gluing one end of your fabric string to the paper.

Twist and glue in random places to cover all of the white.

Easy!

To make a larger, BRAIDED fabric ball, follow these instructions:
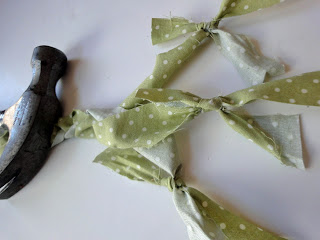
Take three strips of fabric and tie them at one end.

Use something heavy to secure your end and braid the entire strip.

You want it pretty long, so when you run out of fabric, tie more strips to each end and continue braiding.

When you think it's long enough, tie off your ends (you can always add more later).

You should have a long braid by now.

Take a crumbled paper ball and wrap a second sheet around it loosely to make a larger circumference.

 Then glue and wrap until you have this!

What do you think?

I think I'll keep them around.

Want to link up one of your crafts?
Here you go!
And grab Scrap Happy Saturday button on the side of my blog so others can join in, too!


Link is open until next Friday.
I will then pick a few of you to feature on my blog!

Related Posts with Thumbnails