Monday, January 31, 2011

Kitty Cats and Airplanes Giveaway Winner!

First of all,
THANK YOU so much to all my guest bloggers the past two weeks.

I have enjoyed reading all of your thoughts
and seeing all of your creativeness!

My readers ROCK!

If you ever want to guest post again
{or if any others of you would like to try your hand at guest posting}
please email me and let me know.

Now, onto the winner of the customized envelope clutch
from Kitty Cats and Airplanes.

 Random.org....
do...
your...
thing!

Congrats The Loops!
{by the way... she has an amazing blog... you should check it out!}
~~~~~~~~~~~~~~~~~~~~~~~~~~~~~~~~~~~~~~~~~~~~~~~~~~~~~~~~~~~~~~~~~
I'm going to be revamping the blog a little as I adjust to my new role as 

Mommy
of
Two


My goodness is this hard!
Any and all tips/advice/encouragement is appreciated and wanted.

Not much will change with the blog.
Just giving myself a break if I don't have a spectacular tutorial each week.
I will still make it my goal to post every weekday.
Plus, I need to start gearing up for the Spring Launch of Better Life Bags!

Want to see a sneak peek?

Excited yet?
Did you save some Christmas money?
BLB reopens March 1st!

Friday, January 28, 2011

Guest Post: Amie from Kitty Cats and Airplanes

Hello Better Life Blog readers! I am so happy that Rebecca let me invade her blog today so she can spend time with her new little one. Isn't she fabulous? Her blog and her Etsy shop are so inspiring!

You probably don't know me, so let me introduce myself. I'm Amie, and I run a little blog called Kitty Cats and Airplanes. I'm a full time personal elementary school tutor and I love my job! I also love anything crafty, which is why I started my craft blog back in September. It's a place where I like to share my crafty endeavors, recipes, and other projects that inspire me. I have serious crafting ADD, so you're sure to always find something new and exciting! (My current kick is jewelry, but I also love to sew!)

This is me and my hubby, he's such a dream boat! He's great, he puts up with all of my crafting obsessions and even dabbles in some crafts himself! Some of my favorite projects include:


 And this button bracelet

I have a ton of tutorials so be sure to take a minute to check out all of them! I also have a newly opened Etsy shop where I sell my jewelry!

Since Rebecca's blog is all about bags, I thought it would be fun to add another bag to her tutorial collection!

I call her the envelope clutch. Why? Well....

Because this bad boy was my inspiration. I was sending a letter and was thinking about the envelope (because, you know, everyone ponders envelopes) and I thought, "This is the perfect size for a clutch!" And with some fabric, a sewing machine, and about an hour my inspiration became a reality!

It's got dreamy red satin, oh-so-sensual black lace, and one blingly vintage button! Wanna make one too?

You will need:
  • Large scrap white cotton fabric (at least 10"x13")
  • Large scrap black lace
  • Large scrap red satin
  • Large scrap medium weight, iron-on interfacing
  • Envelope
  • Large sheet of paper (bigger than a regular 8 1/2" by 11")
  • Closure of your choice (button, velcro, elastic, etc.)
  • Iron, ironing board
  • Sewing machine, matching thread, scissors, etc...
Got everything?

The first thing you need to do is carefully cut down the sides of your envelope and open it up. This is how you will create your pattern. Lay it on your larger sheet of paper. (I used a sheet of freezer paper, but you can use newspaper, tissue paper, butcher paper, whatever you've got!) Keep the envelope, you'll need it again soon.

Press your envelope down and sketch about 1/4" all the way around the envelope. I chose to keep the bottom straight to make the sewing easier. When you're done, cut out your pattern and fold it in half, lining up the edges. Trim anything that doesn't match up so you're pattern is symmetrical.

Using your pattern, cut out a piece of red satin, black lace, and white cotton. It is not necessary to cut out your fabric with a rotary mat/cutter, I just prefer it that way. Then, using the envelope as a pattern, cut out the interfacing (so that the interfacing is slightly smaller than all the other pieces.)

I didn't take a picture of the next part because you would have puked if you would have seen my nasty ironing board. Following the directions on your interfacing, iron it onto the wrong side of your cotton fabric nicely centered.

You'll now have three pieces: red satin, white cotton with interfacing, and black lace. Pin the wrong side black lace onto the right side of the white cotton (so both of the fabric's right sides are facing up.) Sew the entire way around the black lace using a very small seam (1/8").

Now you have two pieces! The red satin and an interfacing, cotton, and lace sandwich. Pin the two pieces together (right sides together, so the shiny side to the lace side) and using 1/4" seam, sew around your pieces. Leave a 3 inch or so hole at the bottom for turning.

When the sewing is done, clip the corners so when you turn it right side out, the corners will lay flat.

Turn it right side out. Push out the corners (I like to use a chopstick) and make sure they are nice and crisp. Press flat and make sure all your seams and corners are pretty.

Using a very small seam again (1/8"), top stitch along the bottom and along the point at the top ONLY!! Don't top stitch along the sides.

Fold up the bottom of your clutch so that it resembles an envelope. Look back at it if you need to! Pin the sides together and top stitch using that 1/8" seam on both sides.

Now, I'm hugely a little obsessed with buttons, so I used a fantastic vintage button to close my clutch. You can use whatever you'd like, magnetic closures, snaps, velcro, elastic/button, whatever works for you!

When you're done, plan a special date with your honey because this little clutch needs to get out!!

It's the perfect size to hold just the essentials: cell phone, keys, lipgloss, credit card, and maybe something extra!

Like the clutch but don't have the time to make one for yourself? Well, you're in luck, because I'm giving away an envelope clutch! And the best part is, YOU can help me design it! Your own custom clutch with your favorite colors/designs. How do you enter?

 Mandatory: Follow Better Life Bags Blog and leave a comment with your email address (so you can be contacted if you win!)
Want extra entries? You can...
Just leave a comment for each extra entry you do!
Giveaway ends Sunday night at midnight PST.
Winner will be announced Monday morning.
    FIVE ways to win! Aren't you excited?? Thanks for letting me be here today, Rebecca. I hope you enjoyed my tutorial, and I'd love to see you over at Kitty Cats and Airplanes sometime! :)

    Thursday, January 27, 2011

    Guest Post: Tiffany from Killing Time!

    First off can I say how excited I am to be guest posting for the fabulous Rebecca here at Better Life Bags while she is enjoying that precious newborn time with Miss Lady Bug??? 
    I am so happy for her even though I only know her through her wonderful blog!!

    A little about me.. I'm Tiffany, a stay at home mom to 5 kiddos.
    Yes, I said 5 kids!!  ... 4 boys and 1 girl!
    Needless to say, I don't get much crafting time in.  I usually do that after the kids go to bed and usually end up staying up way too late trying to get just.one.more.thing.done.

    I have a little blog, Killing Time, where I show off some of my successes... I would love for you to have a look around and let me know what ya think! I'm pretty new to blogging so bare with me here, I'm still working on my tutorial writing skills...

    When I learned I would be doing a guest post I was so excited.. 
    Then I freaked out! 
    What am I going to write about? 
    What could I make? 
    Would it be good enough? 
    What could I do that hasn't been done before or at least a hundred times before so much better? 

    So I decided to keep it simple. I was inspired by my daughter's Christmas present of earrings, she loves earrings but I usually find them scattered all over the house.
    I made a simple earring holder display for her.


    As I'm all about using what I have on hand and keeping it super cheap or free, this can be done with what you usually have laying around.

    Supplies:
    cardboard - styrofoam block could also be used
    hot glue gun
    fabric scraps
    scissors
    ribbons and other embellishments if desired

    First off decide how big you want it and cut cardboard to size. The tray was actually a tube thing that was in the packing of a different gift, you could just make a tray with cardboard.


    I figured mine needed to be 4 layers of normal cardboard so the earrings wouldn't poke through the pack. So I folded the flaps of those 2 pieces over and glued those down with a strip of glue on each edge. 

    Just do the edge, we don't want glue between the cardboard for the main body of it, it would be too hard to push earrings into..


    Then glue your two pieces together, remember just glue along the edges..
    (This piece could be substituted with a styrofoam block)


    Make your tray or in my case I just glued the flaps together on mine to form the tray.


    And goodness I just realized how awful my nails look.. 
    5 kids remember? 
    Don't judge me..

    Okay back to work..
    Now on your scrap of fabric trace your main piece and cut out leaving a little extra to fold over the back.


    Glue just along the edges.


    And look how nice and smooth the front is..


    Now cut and glue your scraps to cover the tray, this is the most time consuming part, I'm sure there has to be an easier way than what I did..


    Cover the bottom and all sides except the back.


    Now glob generously put some glue onto the back.


     Then place it onto the front of your main piece and press it firmly.


    I glued on some tulle for a hanger, you can use ribbon if you want, I just didn't have any matching ribbon on hand.


    Now you can embellish or decorate however you choose. I decided to add a bit of trim to the front of the tray for hoops and hook earrings..


    I actually made this hanger a little too long so it leans some. I just gathered the tulle and re-pinned it a little lower to solve that problem.


    Super easy and it can be decorated or personalized however you choose.

    I hope you enjoyed my little project and will check me out over at Killing Time to see more of my midnight projects. 
    Thank you for looking and Thank You so much Rebecca for having me!

    It was my pleasure to have you, Tiffany!  I LOVE the genius idea of using lace to hang the hoop earrings from!  You are so creative!
    ~ Rebecca 

    Wednesday, January 26, 2011

    Guest Post: Photo Book Girl

    I am THRILLED to have Photo Book Girl guest posting for me today!  I stumbled upon her blog awhile back looking for the best photobook deal.  She is constantly posting photobook coupons and deals that I take advantage of often.  And has an A M A Z I N G photobook wizard that guides you to the exact photobook you're looking for (in your price range)!

    Little did I know that we had been following each other this whole time!

    Thanks for posting Photo Book Girl! 


    ~~~~~~~~~~~~~~~~~~~~~~~~~~~~~~~~~~~~~~~~~~~~~~~~~~~~~~~~~~~~~~~~~~~~~~~

    Make Your Own Digital Cookbook

    If you’re a fan of Better Life Bags like I am, you certainly appreciate creative and high quality, custom gifts. I’m excited to have this opportunity to write about a topic that I know is of personal interest to Rebecca, and a topic she tells me is of interest to her readers as well.

    Have you ever thought about making your own cookbook? The ease and widespread availability of print-on-demand photo books and books in general, have opened up tons of creative possibilities for users. No longer does having your creations professionally printed mean spending a lot of money and stockpiling a hefty minimum order of copies. You can now print 1 or 100 books at a reasonable price that look like they came straight from the bookstore.

    Making your own cookbook does not require any expensive or overly technical software. Photo book companies offer free and easy to use software to create your project – you only pay if you decide you want to order a copy. Many allow you to share your creation on line for free as well. Choosing which company to print your project depends on how much flexibility and design options you wish to have.

    Pre-Made Cookbook Templates

    The easiest route is to pick a company that offers a cookbook theme complete with pre-made layouts and clip art to embellish your pages. All you have to do is to add your recipes and photos. I did a survey of photo book companies and found that the following have ready to use cookbook templates (the links below will take you to my review/overview of the company where you can find more specific info about each company).

    The screenshot below each company shows a sample of each printer's pre-made templates.


    APix


    Blurb


    inkubook


    mixbook


    Picaboo

    Please note the companies above are not an exhaustive list, but just an illustrative list. There are other companies out there and I have more information and reviews of various companies on my site. If you’d like to be able to design your cookbook from scratch, you can also opt for a company that will allow you to completely customize your own layouts. All the companies above except for Inkubook allow you to create custom layouts.

    If you’re lucky and you have an external design program like Adobe InDesign or Photoshop, even better – you can save your layouts in jpeg format and upload them straight to any company.

    Tips and Steps to Making Your Own Digital Cookbook

    1) Gather those recipes – from friends, from family, from your own kitchen, the more the better, but 25 to 30 recipes is a good number;
    2) Type them up on your computer in a program such as Microsoft Word and use spell check to proofread them;
    3) Group your recipes into categories if you wish (such as soups, salads, beef entrees, fish entrees, desserts) or group the recipes by the family or friend that contributed them;
    4) Select a photo book company to print your photo book;
    5) Create your layouts from scratch (or use premade cookbook templates) and copy and paste your recipes onto the pages;
    6) Add photos of the contributing cooks and/or of the dishes (a mouth-watering photo is always welcome in a cookbook);
    7) Add any embellishments such cooking-related clip art for fun, or add shadows, frames etc. to customize the look

    Make it a Collaborative Effort

    Instead of one person collecting the recipe and designing the book, think about making it a fun group project. I have a good group of friends who love to cook and we often get together to share our creations at various potlucks. I suggested to my friends that we make a collaborative cookbook / yearbook complete with our favorite recipes and photos we’ve taken throughout the year. Because I wanted my friends to experience the process of making an online book themselves, I selected Mixbook for my cookbook project since the company allows several collaborators to work on the same cookbook project file. Each person signs up for a free account to upload their own recipes and create their own pages from their comfort of their own home.

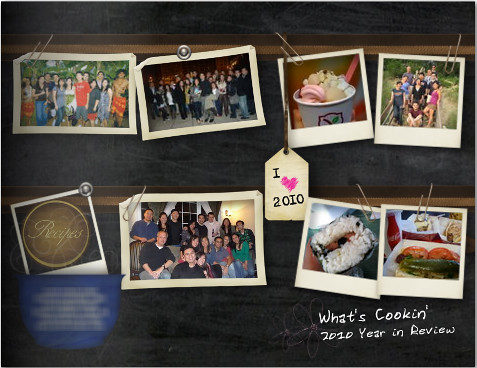
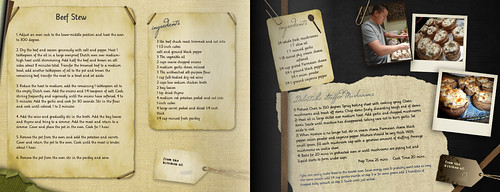
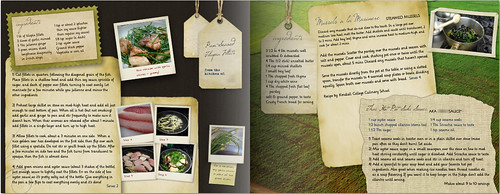
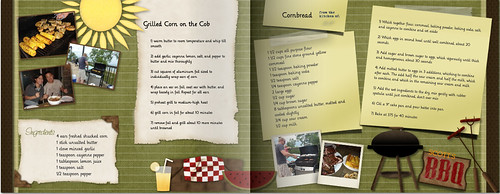
    Here are some shots of my group cookbook project. Note that every page of the book was created with the software and clip art provided within the Mixbook program. There was nothing that we had to pay for and nothing special added except our own photos and recipes. In particular, I like that Mixbook has very usable and what I would call “non-cheesy” clip art. I’ve sent my cookbook in for printing, so I’m looking forward to receiving it and posting a review of the final product soon!

    Picture 5

    Picture 7

    Picture 8

    Picture 9

    Custom Cookbooks Make Great Gifts

    I’m sure that many of you have either given or received a personalized gift that has remained a treasured gift for years after it’s been gifted. I have made several traditional scrapbooks as gifts in the past and my friends love to show me that they’ve kept my gift years later. What’s great about digital cookbooks (versus say making a scrapbook by hand) is that you can create your book and then order multiple copies for friends and family – although I still love traditional hand made scrapbooks, it would be quite time consuming to make several of them.

    Cookbooks would be great for:

    -School, Church or Club Fundraisers
    -Passing down family recipes to a newly married couple
    -Holiday gifts
    -Birthday gifts
    -Family reunions

    After the cookbook is done, a perfect way to celebrate together is to cook up a bunch of the recipes and throw a cookbook signing party!

    ______________

    Photo Book Girl is hopelessly obsessed with photo books (and with food!). She writes a blog reviewing photo book companies and tracking coupons and deals, as well as providing tips on how to create your own online masterpiece. You can also find her frequently jabbering away on Facebook (which is how she learned of Better Life Bags). Many thanks to Rebecca for this opportunity to share this with you!

    Tuesday, January 25, 2011

    Guest Post: Finding Time to Meet with God


    This post by Betsy hit home this week as I've been trying to figure out how I'm going to get my daily intake of God's Word with a newborn!
    Take heart, ladies, getting into the Bible can be as simple or as complex as you choose to (and as you have time for).
    Betsy gives us a "tutorial" of sorts on how to dig into God's word with just one or two verses!
    Enjoy!
    ------------------------------------------------------------------------------------------------------------------------ 

    What about your life stays the same? 
    Nothing! 
    There are times and seasons for all things. 

    One thing that stays the same is the fact that  
    when we make the time to meditate on the Word of God, it changes us

    I know I am a better person and better able to handle life, when I make that time. 
    There are seasons in my life 
    where I can make the time to spend larger amounts of time studying and meditating on scripture. 
    Other times I only have  little bits of time

     I've gotten very frustrated with the times I have walked away feeling, "Huh, I just spent that time and learned something, but really nothing impacted me". In order to grow, a person must get into the hearty rich 'meat' of something (Heb 5:12-14). 
    To grow a person needs to not only learn, but allow the lesson to be applied. 

        I have found a system that works for me, so that I can either spend a few minutes or longer in the Word and walk away feeling that the Holy Spirit either encouraged me or challenged me

    Below I am going to walk you through the steps that I take to get a solid meal regardless of the length of time I have
    This is not something that I created, it is just my version. There are many different ways to do this, but this is the simplest way for me.

       I'll use our family's verse for 2010 to model the process.  You can choose any verse you want!

    Ephesians 3:20-21
    "Now to him who is able to do immeasurably more than all we ask or imagine, according to his power that is at work within us,  to him be glory in the church and in Christ Jesus throughout all generations, for ever and ever! Amen." 

    ·         First, take some time to pray and ask God to open your eyes and mind to what He has to say to you. 

    ·         Second, open your Bible and read the verse or passage you want. 

    ·         Third, make statements about the verse. 

    ·         Fourth, ask yourself questions about the statements made. 

     Okay here we go. I'll model the Third and Fourth steps for you.  

    Make a Statement about Ephesians 3:20-21:
    God is able.

    Ask any Questions that come to mind based on the statement:
    What does it say He's unable to do?
    Am I trusting Him to be able?
    What am I trying to "help" Him with?
    If He doesn't do it my way or in my time, does that mean He's unable? 

    Statement:
    His ability, power, and the abundance will affect generations to come.
    Questions:
    Am I living in such a way that future generations will be blessed by my life?

          Write down as many statments and questions from the verse as you can or have time for.  
    Keep in mind that not all of the questions will impact you. Usually one or two thoughts stick out more than others. Or you may have different statements or questions than me. That is the Holy Spirit speaking to you. Those are the places He wants to encourage you with or challenge you with. 

            You can write out a meditation or prayer about what has impacted you the most to conclude your time with God.

    Have more time or want to take it deeper? 
     There is one other piece that I do when studying scripture. I look for the character of God. The reason I do this is because the more you know about a person's character the more you will trust, follow, and love them. A person's character determines how they will act or what they believe. This is why it is so important to learn the character of God. 

                        Character traits that I gleaned from Ephesians 3:20-21: 
    God cares about what we want.
    God can.
                        
        What ones did you find?
     
    May God bless you with His exceeding abundance!


    Monday, January 24, 2011

    Hello Lady Bug... and... Winner of the Yarrrn Giveaway!

    Many of you know already that Lady Bug FINALLY decided to join us!
    Let me debut her to the blog world.
    She was 8lbs 11 oz and 20 inches long.
    (We had a fun contest over on the BLB Facebook page to guess her weight - with a $10 BLB gift card as a PRIZE!  
    If you aren't a Facebook fan, you missed out.  Don't let that happen again and "like" us by clicking "like" on the right of the blog!)

    She's nursing great.
    Sleeping great.
    And SUCH a sweet girl.

    And she looks A LOT like her brother did.
    Check these out.

    He, of course, is much bigger now.
    And is pretty much in love with his baby sister.

    As we all are.

    ~~~~~~~~~~~~~~~~~~~~~~~~~~~~~~~~~~~~~~~~~~~~~~~~~~

    Ok, enough fun... now onto business.
    The winner of the Yarrrn! giveaway is...

    #54
    Jen
     "I Lurvvv the slouch hat! Stylish warmth. I think my toddler would want the owl hat, so cute sleeping or awake."


    Congrats Jen!
    I'll email you now.


    For the rest of you...

    Don't forget that until midnight PST on Tuesday (tomorrow) you can get
    15% off anything in Yarrrn's ETSY shop!!!

    Use the code BLBAGS at the checkout.

    These make GREAT gifts for those people who have everything.
    And unique baby shower gifts!
    Or a perfect treat for YOU!!!

    Handmade gifts and items are always my favorite.
    It's nice to know that when you pay you are actually supporting a PERSON.

    Click here to grab your favorite handmade Yarrrrn item at a great discount price.
    Related Posts with Thumbnails